In this guide
- Understanding your car's paint before you touch it
- The fingernail test: your single most useful diagnostic
- The four types of car scratches and what each one needs
- What you'll need for a DIY scratch repair
- Method 1: Buffing a clear-coat scratch by hand
- Method 2: Machine polishing and dealing with swirl marks
- Method 3: Do scratch repair kits actually work?
- Method 4: Touch-up paint for scratches that reach the colour or primer
- When the scratch has reached bare metal
- The home remedies everyone asks about: toothpaste, WD-40, and magic erasers
- Common mistakes that turn a small fix into a bigger one
- Special cases: black cars, matte paint, bumpers, glass and dashboards
- What it costs, and whether insurance will help
- When to stop and call a professional
- Preventing scratches in the first place
There's a particular kind of frustration that comes with a fresh scratch on your car. You spot it in the wrong light, usually as you're walking away, and from then on your eye goes straight to it every time. The good news? Most of the marks that bother us are far more fixable than they look.
A surprising number can be dealt with at home—with patience and the right approach—rather than an expensive trip to a body shop.
This guide answers the questions people actually ask: how to tell whether a scratch is shallow or serious, which fixes match which damage, whether the home remedies you've heard about really work, and when a scratch has gone too far for DIY. Before we get into methods, here's the one thing that changes everything: what your car's paint is actually made of.
Understanding your car's paint before you touch it
Modern car paint isn't a single coat of colour. It's a stack of layers, and the depth a scratch reaches into that stack decides how hard it'll be to fix. According to Synchrony, a typical modern finish has three main layers: a clear coat on top (lacquer that protects the colour against UV rays and oxidation), a base or colour coat in the middle (on premium cars, this carries metallic flake or a pearlescent effect), and a primer underneath (sprayed onto the bare metal to give the paint something uniform to bond to). Below all of that sits the metal body panel itself.
RAC describes the same structure—clear coat, base coat, primer, then metal—and both sources make the same point: whether you can fix a scratch yourself depends entirely on how deep it goes. A mark that only disturbs the clear coat is cosmetic. A mark that cuts through to the metal is a corrosion problem. Those are two very different jobs.
This is also why even a minor scratch is worth taking seriously. Synchrony notes that left untreated it can expose the paint or metal beneath to the elements and, over time, lead to rust or peeling paint. Even minor bodywork issues can affect the estimate you receive later if you sell or trade in the car. Catching a scratch early keeps a small cosmetic fix from turning into a bigger structural one.
Key terms
- Clear coat
- The top layer of lacquer that protects the colour against UV rays and oxidation. Most everyday scratches affect only this layer and are the easiest to fix.
- Base coat (colour coat)
- The middle layer that carries your car's colour—and on premium cars, metallic flake or a pearlescent effect. A scratch that reaches here needs more attention to prevent fading or corrosion.
- Primer
- Sprayed onto the bare metal to give the paint something uniform to bond to. Any breach of the primer increases the risk of rust and typically requires touch-up paint or repainting.
The fingernail test: your single most useful diagnostic
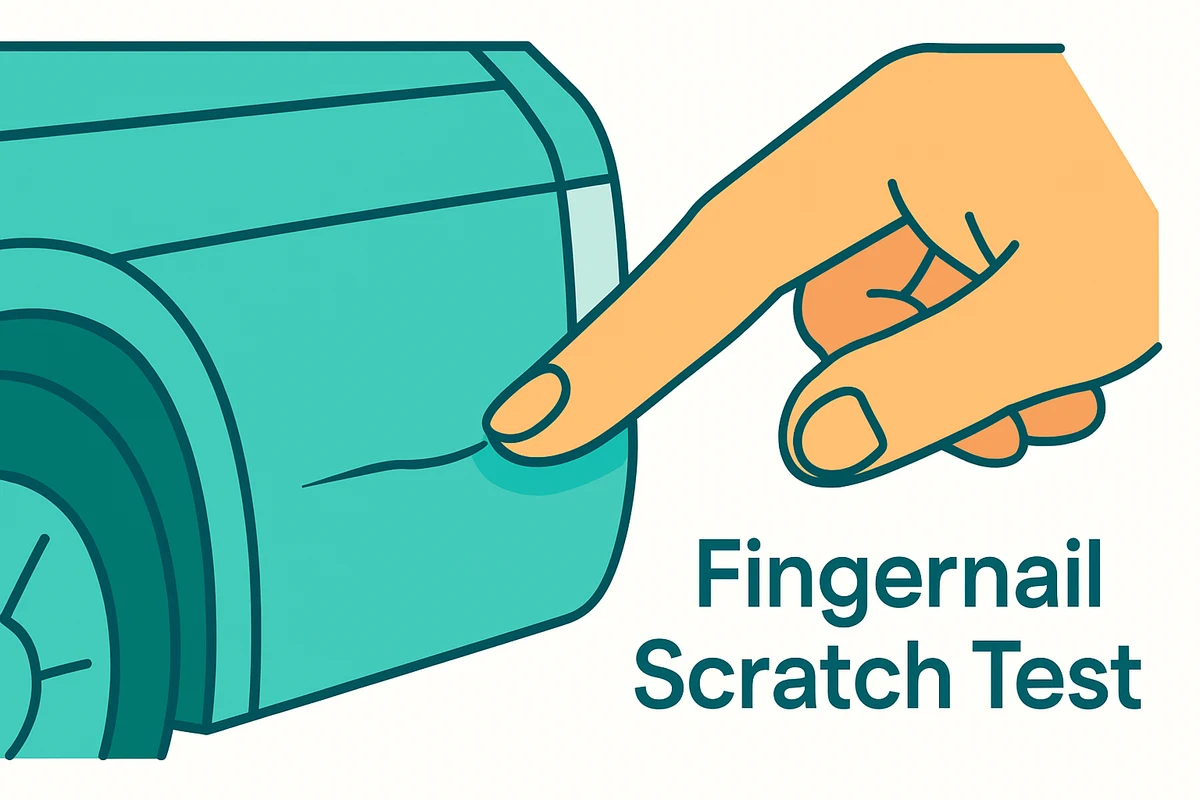
Before you buy anything or rub anything on your paint, do this test. Professionals and retailers alike recommend it first—it tells you almost everything you need to know.
Run a fingernail gently across the scratch.breaks the result into three outcomes: if you can't feel it, the scratch is usually shallow enough to polish out; if you can feel it slightly, you may need touch-up paint; if your nail drops into a deep groove that catches, expect a more extensive repair and possibly professional help. Supercheap Auto frames it bluntly: if your nail catches, you'll need a paint repair specialist—if it feels smooth, DIY should work.
There's a second visual clue worth knowing. RAC notes that a clear-coat scratch often appears white in certain light and frequently disappears when the area is wet. You won't see primer or bare metal through it.
Chemical Guys adds that deep scratches exposing primer or metal are the ones that tend to catch a fingernail. Together, the fingernail test and the "does it vanish when wet" test give you a reliable, no-cost read on how serious the damage is.
Keep that diagnosis in mind, because every method below is matched to a specific depth. An aggressive fix on a shallow scratch wastes paint. A gentle fix on a deep one wastes your time.
The four types of car scratches and what each one needs
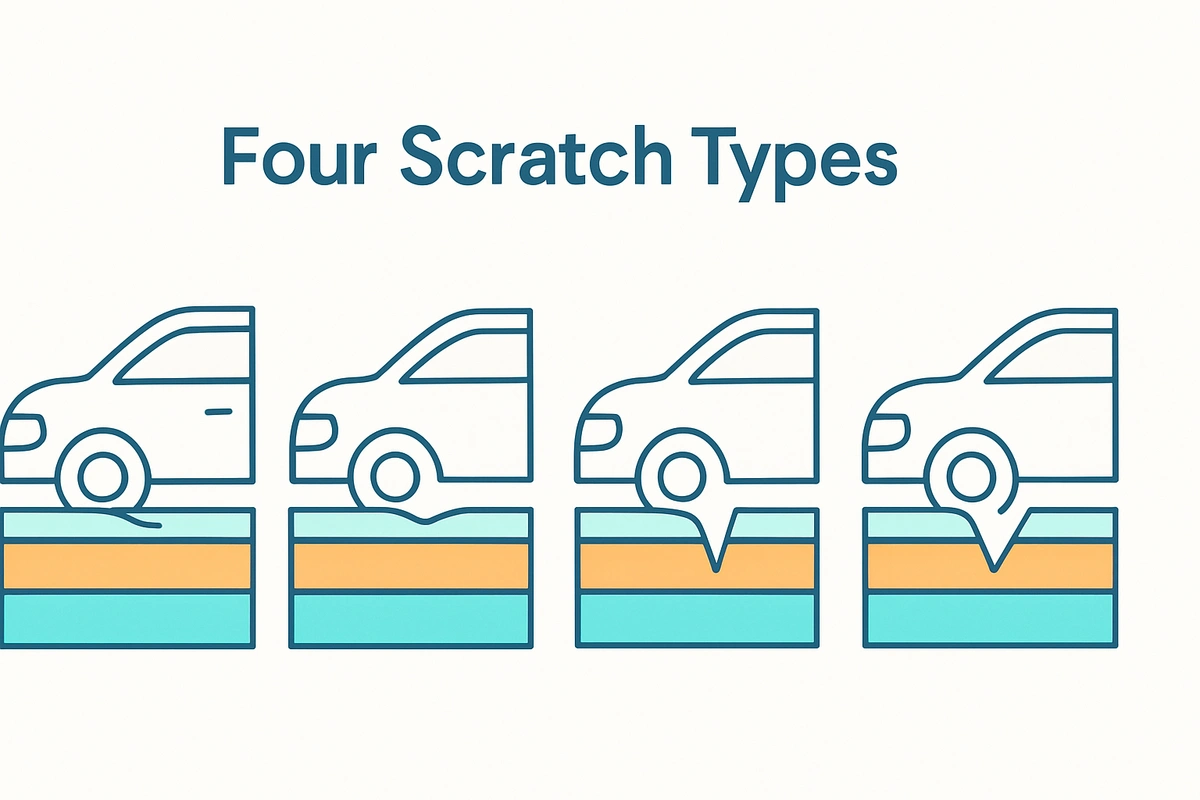
Once you know how deep the damage goes, you can sort almost any scratch into one of four categories. This is the framework,and Tyrepower all use, and it maps cleanly onto the fixes that follow.
1. Clear-coat scratches
Affect only the top glossy layer—colour coat and primer stay untouched. Synchrony calls these the most common and easiest to fix. They come from everyday contact—washing, dust, light brushes against plants—and usually fade well with steady hand buffing.
2. Surface or paint-layer scratches
Reach into the colour coat but don't expose primer or metal. They appear as faint white lines or dull streaks and often need a cutting compound or stronger polish. Touch-up paint is sometimes required before a final buff.
3. Primer scratches
Cut through the colour coat down to the grey primer layer. Any breach of the primer increases the risk of rust. Tyrepower is direct: you won't be able to fully buff these out—the area needs to be repainted or handled with a touch-up kit.
4. Deep scratches through to metal
Synchrony calls these the most serious, cutting through all layers to expose bare metal or plastic. Exposed metal can quickly rust if not treated, which is why professional repair is usually recommended. The panel has to be rebuilt with primer, colour and clear coat.
Synchrony summarises it neatly: clear-coat scratches call for buffing, surface scratches for a scratch repair kit or professional detailing, primer scratches for DIY primer spray and touch-up paint, and deep scratches through metal for a professional paint job. The rest of this guide walks through those methods in order, from gentlest to most involved.
What you'll need for a DIY scratch repair
You don't need a professional bay to tackle a clear-coat scratch, but a few basics make the difference between a clean result and fresh damage. Drawing on the tool lists fromand, a sensible kit looks like this:
- Car wash supplies for cleaning the area first
- A scratch remover or cutting compound / polish suited to the scratch depth
- Clean microfibre towels for buffing and inspecting progress
- Hand buffing pads, and optionally an orbital buffing machine for larger areas
- A detailing spray to lubricate the pad
- Masking tape to protect trim, glass and unpainted areas
Chemical Guys stresses that compounds and polishes do different jobs. Compounds are used first to reduce visible defects, and polishes refine the surface afterwards. Choosing the right combination helps you correct the scratch without removing unnecessary paint.
Supercheap Auto's list separates hand pads from a machine polisher because the two suit different scales of work. This matters once you move from a single scratch to a whole panel of swirl marks. Both sources also emphasise clean towels: Supercheap Auto warns that if you drop a towel, don't re-use it. Grit picked up off the ground is a quick road to more swirl marks.
Method 1: Buffing a clear-coat scratch by hand

This is the most beginner-friendly repair and the right first move for any scratch that passes the fingernail test. The core technique is remarkably consistent across every source that describes it.
-
1
Move into the shade and wash
Move the car into the shade. Rinse and hand wash it using the two-bucket method (one bucket for suds, one to rinse your cloth before dunking it back)—this avoids dragging grit across the paint. Dry with a quality chamois or microfibre towels.
-
2
Apply scratch remover and buff in circles
Apply a dab of scratch remover to a buffing pad and, using a circular motion with moderate pressure, work it along the length of the scratch. The guidance on pressure is memorable: you're not wiping away dust, but you're not sanding a table either.
-
3
Check progress and repeat
Take a break roughly once a minute, add a squirt of detailer, and wipe the area to check progress. Repeat until the scratch is gone. RAC warns not to let excess product dry on the car—clean it away with a microfibre cloth afterwards, and read the instructions before repeating.
-
4
Stop when it blends, then protect
Chemical Guys frame DIY scratch removal as improvement rather than forcing perfection. Stop once the scratch blends into the surrounding paint under normal lighting—chasing total removal can compromise paint thickness and durability. Finish with a wax or sealant to protect the repaired area.
Method 2: Machine polishing and dealing with swirl marks
If your problem isn't one scratch but a whole panel of fine swirl marks, or if you have several scratches to work through, hand buffing quickly becomes exhausting. This is where a machine earns its place—with some important cautions.
gives the most detailed machine walkthrough. They recommend beginners avoid rotary buffers, which can create a bigger repair problem in the wrong hands. Start with a random orbital instead. Before you begin, mask off any plastic, rubber, glass and unpainted areas.
Apply a few dabs of scratch remover to the pad plus a spray of detailer to lubricate it—this lessens the risk of burning through the clear coat. Spread the product around the panel with the machine off before switching it on. Move the buffer steadily along the panel with light pressure, overlapping each pass by about fifty percent, then wipe it over with a microfibre towel to check. Repeat if swirls remain.
provides a structured process that applies whether you work by hand or machine: wash the surface first, dry and inspect the scratch under both direct and indirect lighting, test your product and pad on a small inconspicuous spot to confirm cutting strength, work in small controlled sections with overlapping passes, inspect progress frequently by wiping away residue, and stop as soon as improvement is achieved.
Hand polishing offers more control for beginners while machines give faster, more consistent corrections when used properly.agrees the honest answer is "both": hand buffing for light scratches, and the machine for deeper marks provided you run it steadily.
The recurring warning across all three sources is heat. Chemical Guys explains that excess pressure increases heat and friction, which can thin the clear coat and leave an uneven finish. Let the product and pad do the work. Tyrepower makes the same point about staying in one spot too long. A machine multiplies both your speed and your capacity for mistakes, so light pressure and constant movement matter more than when you work by hand.
Method 3: Do scratch repair kits actually work?
"Do scratch repair kits actually work?" is one of the most common questions people ask. The honest answer is: for the right scratch, yes, and there is hands-on testing to back that up.
Car and Driver put a range of top-rated scratch-repair products to the test on a long, light scratch down the side of a truck. Removing light scratches is one of the most beginner-friendly DIY car-care jobs. Their standout was a kit using a scratch-eraser pad driven by a household drill.
You apply the remover to the pad in an X shape, run it back and forth along the scratch, and wipe the excess with a clean microfibre cloth. The pad was faster, easier and more effective than conventional rub-on removers, with one catch: you need a drill. For their budget pick—a one-step liquid remover—they rubbed it over the scratch in a circular motion in three thirty-second passes and saw improvement after a single pass. Their consistent finding was that the more passes you complete, the better the scratch looks.
It's worth being clear about what these kits are for.distinguishes simple liquid scratch removers (which suit minor clear-coat blemishes) from fuller repair kits you reach for when you can feel the scratch with a fingernail. Those kits generally include a putty to fill the cavity, a liquid leveller to remove excess putty, a clear-coat applicator, and ultrafine sandpaper to wet-sand off any uneven lacquer.
adds that polishing kits are designed to improve surface clarity and reduce visible defects by levelling the clear coat safely—when used correctly, rather than magically erasing every mark. Set your expectations to "significantly less visible" rather than "as if it never happened," and a good kit will rarely disappoint on a shallow scratch.
Method 4: Touch-up paint for scratches that reach the colour or primer
Once a scratch is deep enough that polishing alone won't restore the colour, you move from removing paint to replacing it. Touch-up paint is where this starts, and it begins with getting the colour right.
Canadian Tire lays out a clear paint-pen process. First, locate your vehicle's colour code on the vehicle identification plate (commonly inside the driver's door jamb, under the hood, or in the glove box) and match that code to the paint pen. Clean out the scratch with a damp cloth, using wax and grease remover if there's buildup. The cleaner the surface, the smoother the paint applies.
Prepare the surface with the pen's abrasive tip to remove loose paint or rust, and let it dry. Shake the pen for twenty to thirty seconds. If using the fine tip, test it on scrap paper first to get the flow going. Apply the paint evenly in one direction, let it dry for thirty minutes, and repeat for additional coats if needed. Finally, apply the clear sealer over the dry paint and let it dry for another thirty minutes, wiping off any excess.
describes the equivalent repair for a primer-level scratch in more detail: clean the area, lightly sand the rough edges with 2000–3000 grit wet-and-dry paper, apply colour-matched touch-up paint in thin layers (letting each coat dry fully), then apply clear coat and finally wet sand and polish to blend the repair.
offers a similar layered sequence for primer scratches: sand to smooth the edges, apply primer spray and let it cure, build up thin layers of colour-matched touch-up paint, seal with a clear coat, and buff and polish once dry to blend it into the surrounding finish.
Two honest cautions run through all of this. RAC notes that touch-up paint is usually a more permanent fix but may require some finesse to blend in properly.reminds us that once you're into the primer, polishing only softens the edges and the colour won't come back on its own. Touch-up work rewards patience and thin coats.
When the scratch has reached bare metal
A scratch that exposes bare metal is a different situation. It's no longer only about appearance. It's about stopping rust.
is clear that deep scratches through to metal are the most serious, because exposed metal can quickly rust if not treated. In most cases professional repair is recommended. If you do tackle it, their sequence is to sand the area to remove roughness and any existing rust, apply a rust-inhibiting product on bare metal, then build up primer, colour-matched paint and clear coat (letting each layer dry before moving to the next), polish to restore shine, and inspect periodically for returning rust.
describes the same repair: remove rust with fine sandpaper, apply anti-rust primer, add colour-matched paint, build up multiple clear-coat layers, then wet sand and polish once cured.reinforces it plainly: buffing won't repair this kind of damage. The panel has to be rebuilt with primer, colour and clear coat, so it's safest to have a professional handle it.
The time-sensitive part is the rust. The moment metal is exposed it's vulnerable, so even if you plan to book a professional repair, keeping the area clean and dry meanwhile helps limit corrosion before the panel is sealed.
The home remedies everyone asks about: toothpaste, WD-40, and magic erasers
Search for car scratches and you'll quickly meet the folk remedies. Here's where the evidence supports them and where it doesn't.
Toothpaste. This one has a real, if narrow, use.explains that if your fingernail doesn't catch (meaning the scratch is only in the clear coat), toothpaste may help. Whitening toothpaste works best, but any brand will do. Rub it into the scratch, rinse thoroughly with soapy water to remove excess, and dry with a microfibre cloth.
If the scratch remains you can repeat, but RAC cautions not to repeat more than twice to avoid lasting damage.agrees that although toothpaste isn't a proper car polish, it can be used on light scratches. It's a mild abrasive that can nudge a shallow clear-coat mark—not a repair for anything deeper.
WD-40. This one is widely misunderstood.notes that WD-40 can be used on scratches but shouldn't be a primary scratch remover. It works by helping to dissolve the top layer of paint so the underlying paint is exposed, which can reduce the visibility of light scratches but isn't effective for deep ones.
For a light scratch, spray it on, buff it in circles with a soft clean cloth, then protect the area with wax or polish to help it blend in. Read carefully: this is less "WD-40 removes scratches" and more "WD-40 can temporarily mask a shallow scratch." That's a meaningful difference if you want a permanent fix.
Magic erasers. Here honesty beats inventing a source: none of the tested, step-by-step repair guides consulted for this article endorse a melamine "magic eraser" as a paint-scratch fix. Treat the idea with real scepticism. Melamine foam is an abrasive, and using an abrasive of unknown grit on your clear coat is exactly the kind of uncontrolled correction the professional guidance here warns against. To reduce a light scratch, the proven route is a purpose-made scratch remover used gently—not a household eraser whose abrasiveness you can't judge.
The theme connecting all three is depth: every one of these remedies, at best, addresses a shallow clear-coat scratch. None is a substitute for touch-up paint on colour-coat or primer damage.
Common mistakes that turn a small fix into a bigger one
Most DIY scratch repairs that go wrong do so for the same handful of reasons. Avoiding them is honestly more than half the job.
lists the big ones. Skipping proper surface prep is first: polishing without washing first traps dirt between the pad and the paint, which introduces new scratches. Using too much pressure is next—more force means more heat and friction, which can thin the clear coat and leave an uneven finish. Choosing the wrong product or pad (such as an aggressive compound on a light scratch) removes more paint than necessary.
Working areas that are too large at once reduces your control and makes progress hard to judge. And expecting instant or perfect results pushes people to keep going past the point of safety.
echoes several of these: worn or dirty cloths can leave fine scratches you won't notice immediately, so choose car-safe products and a soft microfibre cloth; polishing in the sun makes the product dry too fast and streak; staying in one spot too long can thin the clear coat.
reinforces the sun point by insisting you move the car into shade before you start and never re-use a dropped cloth.adds two more habits: always work in a shaded area, and test the product in a small, inconspicuous spot before applying it to the whole scratch. If you internalise only three rules, make them these: wash first, work in the shade, and stop while you're ahead.
Special cases: black cars, matte paint, bumpers, glass and dashboards
Not every scratch sits on a flat, glossy, painted steel panel, and a few situations deserve their own note.
Black cars. Dark paint is famously unforgiving.notes that black cars show scratches more easily than lighter vehicles, so identifying the depth first matters especially. Light clear-coat scratches can often be removed with a scratch remover or polishing compound followed by protective wax or sealant. Deeper ones may need colour-matched touch-up paint.
Their key warning is to avoid harsh abrasives and excessive polishing, because black highlights imperfections and can develop swirl marks if treated incorrectly. Gentler and slower is genuinely better here.
states plainly that while scratches in matte paint can be repaired, it's trickier than gloss. The standard buffing method won't work on matte paint, vinyl wrap, ceramic coatings or protective films. If your car has any of these finishes, don't reach for a cutting compound—a normal polish can permanently ruin a matte or wrapped surface.
Bumpers and plastic trim. Bumpers are usually plastic rather than metal, which changes the rust equation: a scuff that hasn't broken through to primer is often a purely cosmetic buffing or touch-up job. As with any panel, the fingernail test still tells you whether you're dealing with a clear-coat mark or something that's cut into the colour.
Window and glass, dashboards and interior trim. Here the paint guides simply don't apply, so honest caution beats borrowed authority. Glass isn't paint: it's far harder, it can't be "filled" with touch-up paint, and clear-coat compounds aren't formulated for it. A genuine windscreen scratch calls for a dedicated glass product or a professional assessment.
The same holds for a scratched dashboard or interior trim—these are textured plastics rather than body panels. Treat both as their own separate tasks rather than assuming an exterior scratch remover is the answer.
What it costs, and whether insurance will help
People understandably want a sense of scale before choosing between a DIY fix and a professional one. The figures below come from the UK market and are useful as a rough guide to relative cost rather than a local quote, but the pattern holds broadly anywhere.
puts DIY costs in tiers: a clear-coat scratch needing only a remover and polish is cheapest, a primer-level scratch requiring touch-up paint, clear coat and sandpaper costs more, and a metal-exposed scratch needing rust treatment on top of paint costs more again (with a complete repair kit in a similar mid-range band). Professional bodyshop work climbs steeply from a minor scratch to a deep scratch on one panel to a full multi-panel repaint.
notes a professional paint job is the most expensive option because it involves stripping the existing paint and applying a fresh coat. Cost rises sharply with depth. That's one more reason the fingernail test is so valuable.
On insurance,offers a realistic caution: whether a policy pays depends on the policy, but on many the excess would be more than the cost of doing the work yourself. That can make a claim pointless. Some insurers offer a separate scratch-and-dent product for fixing minor damage without claiming on your main policy.
If the scratch results from a collision or suspected vandalism you may need to go through your insurer. In the case of vandalism you may want to file a police report. In short: for a minor scratch you can polish out, a claim rarely makes sense. For serious or malicious damage, it may.
When to stop and call a professional
DIY is the right call for a great many scratches, but knowing where the line is protects both your paint and your money.
suggests professional repair when scratches cover a large area or multiple panels, when deep scratches have exposed metal or primer and risk rust, when you're unsure about DIY methods, when finish quality matters for resale, or when the car has high-end paint requiring colour matching beyond the scope of DIY. A professional repair ensures a proper colour match, seamless panel blending and an OEM-quality finish that helps preserve the car's value.
adds specific situations where repainting becomes unavoidable: the scratch covers multiple panels, metal is exposed over a large area, paint has started peeling around it, the vehicle has metallic, pearlescent or matte paint that's difficult to match, or the scratch is deeper than a touch-up kit can fill.
frames the principle for anyone on the fence: DIY correction is about safe improvement, and knowing when to stop and seek help is part of protecting your paint.
adds a resale-minded nuance: if a mark won't fade with careful buffing, that's usually a sign buffing alone isn't enough. Take the car to a scratch repair shop, especially if you plan to resell—unfinished DIY work can cost you more in the end. Matching modern metallic and pearlescent paint is genuinely difficult, and a clean professional blend often costs less than a botched DIY attempt that then has to be corrected.
Preventing scratches in the first place
The best scratch repair is the one you never have to do. Prevention is largely about how you wash, where you park, and how you protect the paint.
groups prevention into a few habits: use a two-bucket wash with soft microfibre mitts (changing the water frequently and avoiding direct sunlight to prevent drying spots and swirls); add a layer of defence with paint protection film or a ceramic coating; park away from shopping carts, tight lots, overhanging branches and heavy foot traffic; and wax regularly, since a good wax or sealant helps maintain the clear coat's integrity, mask minor marks and protect against contaminants.
On whether microfibre and car covers themselves cause scratches, the guidance consistently treats clean, soft microfibre as the safe choice and dirty or dropped cloths as the hazard. The material isn't the enemy; grit trapped against the paint is.
Improper washing is, in fact, one of the leading causes of scratches to begin with. Synchrony notes that poorly maintained automatic-wash brushes or careless hand-washing can trap grit and drag it across the paint.similarly attributes many scratches to improper washing, dirty towels and automatic car washes. That's a hopeful message, because it means much of your scratch risk is within your control.
The bottom line
Almost every question about car scratches comes back to one asked at the very start: how deep is it? Answer that with a fingernail and a splash of water, and the right path becomes obvious. A shallow clear-coat scratch is a patient afternoon with a polish and a microfibre towel. A colour-coat or primer scratch is a careful touch-up job with the correct colour code and thin coats. A scratch to bare metal is a rust problem that usually belongs with a professional. And the home remedies, at their honest best, only ever help the shallowest marks.
If you'd rather not gamble with a compound and a machine, or if the fingernail test tells you the damage has gone past a simple buff, professional paint correction restores the finish without the risk of thinning your clear coat or leaving swirl marks behind. That's exactly the kind of careful, paint-safe work our Car Polishing & Waxing service at Wash & Polish is built around, so your finish comes back to its best and stays protected against the next mark.